Difference between revisions of "Citizen CLP621"
| Line 11: | Line 11: | ||
====Installation==== | ====Installation==== | ||
1 Download the drivers here [[File:Citizen_7.1.5_M-2.exe]] and Save them to your desktop | 1 Download the drivers here [[File:Citizen_7.1.5_M-2.exe]] and Save them to your desktop | ||
| + | |||
2 Double click Citizen_7.1.5_M-2.exe and run the Installation Wizard | 2 Double click Citizen_7.1.5_M-2.exe and run the Installation Wizard | ||
| + | |||
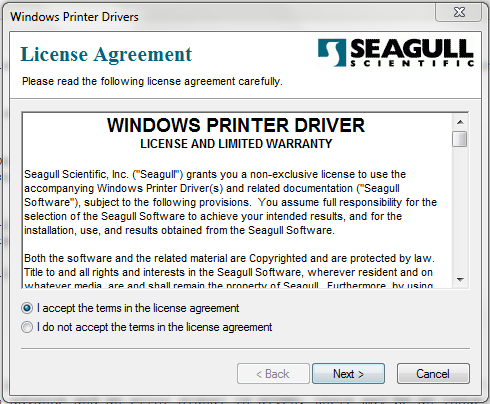
3 Accept the License Agreement and click Next | 3 Accept the License Agreement and click Next | ||
| + | |||
[[Image:Citizen1.png]] | [[Image:Citizen1.png]] | ||
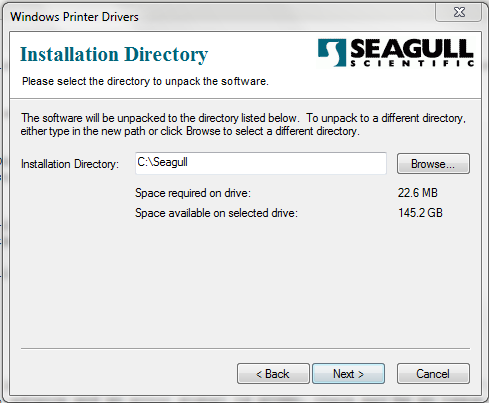
4 Accept the Installation Directory (C:\Seagull by default) and click Next | 4 Accept the Installation Directory (C:\Seagull by default) and click Next | ||
| + | |||
[[Image:Citizen2.png]] | [[Image:Citizen2.png]] | ||
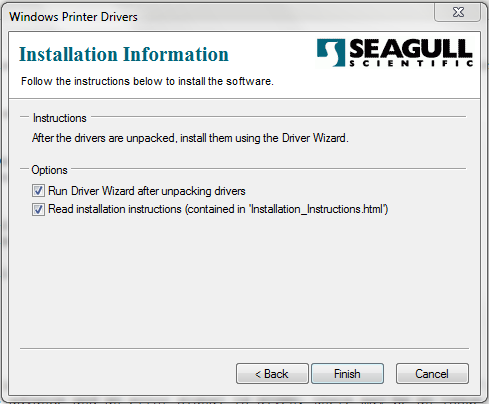
5 Click Finish to unpack the driver and launch the Setup Wizard | 5 Click Finish to unpack the driver and launch the Setup Wizard | ||
| + | |||
[[Image:Citizen3.png]] | [[Image:Citizen3.png]] | ||
** Installation Instructions are displayed, use these as further reference | ** Installation Instructions are displayed, use these as further reference | ||
| + | |||
6 In the Setup Wizard, choose to Install a New Printer | 6 In the Setup Wizard, choose to Install a New Printer | ||
| + | |||
[[Image:Citizen4.png]] | [[Image:Citizen4.png]] | ||
7 Choose your printer model (CLP621 in this case) | 7 Choose your printer model (CLP621 in this case) | ||
| + | |||
[[Image:Citizen5.png]] | [[Image:Citizen5.png]] | ||
8 Choose the port you are installing on | 8 Choose the port you are installing on | ||
| + | |||
[[Image:Citizen6.png]] | [[Image:Citizen6.png]] | ||
9 Choose to share the printer as ''CitizenCLP621'' | 9 Choose to share the printer as ''CitizenCLP621'' | ||
| + | |||
[[Image:Citizen7.png]] | [[Image:Citizen7.png]] | ||
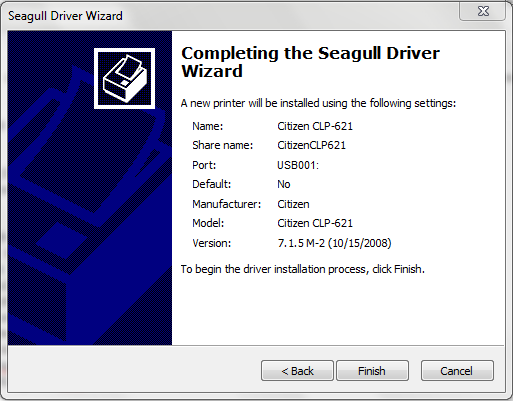
10 Review the settings and click Finish to install | 10 Review the settings and click Finish to install | ||
| + | |||
[[Image:Citizen8.png]] | [[Image:Citizen8.png]] | ||
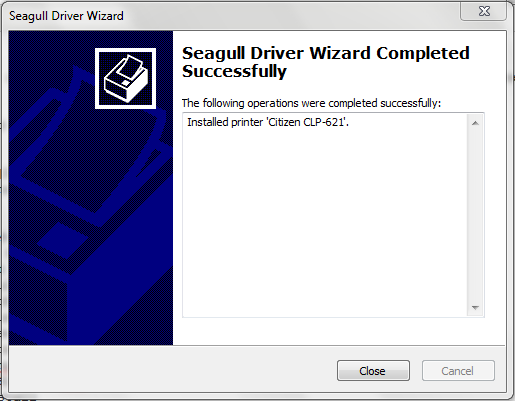
11 When the installation is complete, close the wizard | 11 When the installation is complete, close the wizard | ||
| + | |||
[[Image:Citizen9.png]] | [[Image:Citizen9.png]] | ||
Revision as of 11:54, 11 April 2011
Contents
Product Manual
The product manual outlines printer specific issues, and can be viewed File:CLP621 Manual.pdf in PDF format.
Drivers and Utilities
Up to date Drivers and Utilities can be found at the Citizen Support Site
CLP Series Windows Driver Citizen_7.1.5_M-2 File:Citizen 7.1.5 M-2.exe VuePrint Utility File:Vue Print Utility Installer.exe
Installation
1 Download the drivers here File:Citizen 7.1.5 M-2.exe and Save them to your desktop
2 Double click Citizen_7.1.5_M-2.exe and run the Installation Wizard
3 Accept the License Agreement and click Next
4 Accept the Installation Directory (C:\Seagull by default) and click Next
5 Click Finish to unpack the driver and launch the Setup Wizard
- Installation Instructions are displayed, use these as further reference
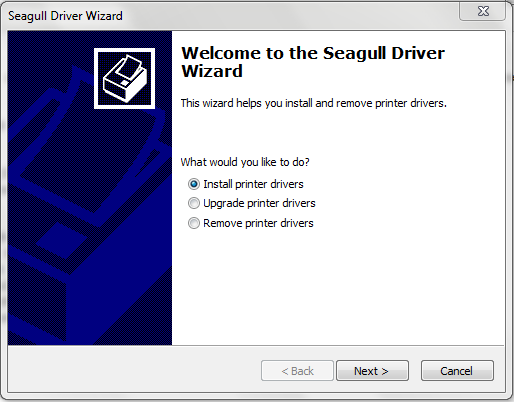
6 In the Setup Wizard, choose to Install a New Printer
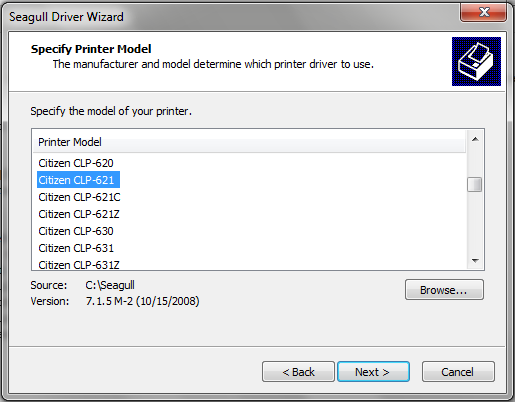
7 Choose your printer model (CLP621 in this case)
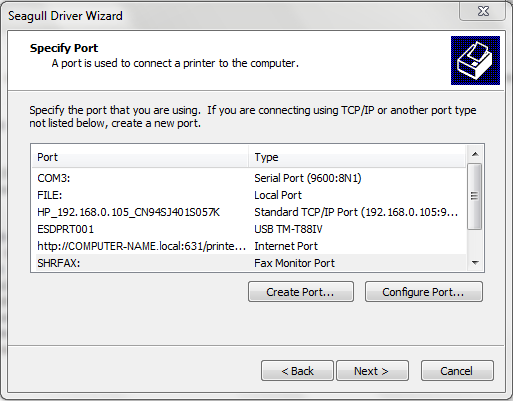
8 Choose the port you are installing on
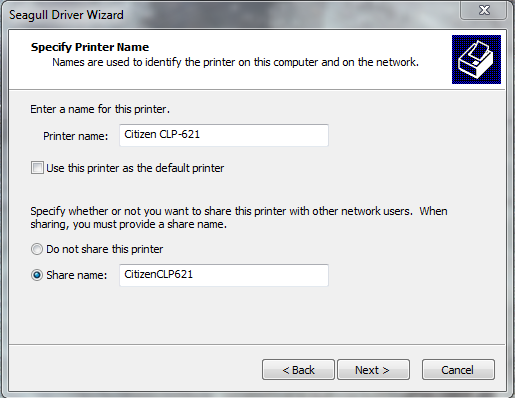
9 Choose to share the printer as CitizenCLP621
10 Review the settings and click Finish to install
11 When the installation is complete, close the wizard
Troubleshooting
Alignment Problems
Label Gap Sensor
The Label Gap Sensor is used to determine the length of each tag, and controls the advancement of tags. If printing or using the Form Feed button causes many tags to advance and an error signal is given, there may be an issue with the Label Gap Sensor alignment. To align the gap sensor, see page 40 of the File:CLP621 Manual.pdf or the Citizen FAQ Site.
